Set up an Amazon Signage Stick in about 10 minutes: plug it into the TV's HDMI port and a wall socket, connect it to Wi-Fi with Amazon's phone app or the remote, choose Brix Signage, then type the code the TV shows into Brix. The Stick is Amazon's $99.99 digital signage player, and across the Signage Sticks running Brix, pairing takes a median of 2.6 minutes from the code appearing on the TV to the screen showing up in Brix. Start a free trial first, so your workspace is ready when the code appears.
Use the phone app if you have a Wi-Fi network with a password, or several Sticks to set up at once. Use remote setup if the network is open, its name is hidden, or you do not have a phone with Bluetooth to hand.
-
What you'll need
- Your Amazon Signage Stick, power cable, and power adapter (plus the HDMI extender if your port is tight)
- A TV or display with an HDMI port that supports HDCP
- A phone with Bluetooth on and internet access (iOS 14 or newer, Android 11 or newer)
- Your Wi-Fi name and password (the network must be password-protected)
- An Amazon account
-
Power the Signage Stick
Plug the Signage Stick into the TV's HDMI port and into power.
-
Download and open the Amazon Signage app
- iOS: App Store
- Android: Google Play
-
Sign in with your Amazon account
If it's your first setup, this creates your organization automatically. For additional sticks, sign in with the same account.
-
Tap "+" to add a Signage Stick
The app scans for nearby unpaired Signage Sticks over Bluetooth — keep your phone close to the stick.
-
Connect to Wi-Fi and select Brix Signage
Make sure your phone is on the same Wi-Fi network the stick will use, choose Brix Signage as the app, and save these settings as a profile to speed up future sticks. The app can set up several sticks at once, and you can assign each one to a location.
-
Wait for installation
The stick updates and installs Brix. This takes about 5 to 10 minutes.
-
Finish up
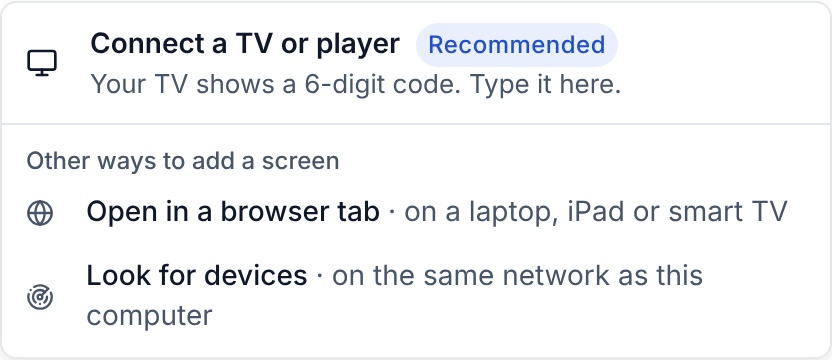
When the app shows it's ready, the TV displays the Brix player. The player shows a six-digit pairing code. In Brix, open Screens, select Add screen then Pair a hardware device, and type the code. If your computer is on the same network as the stick, it is also listed there to claim. Then assign it a playlist or layout to start playing.
-
What you'll need
- Your Signage Stick, power cable, power adapter, and an HDMI-capable display
- The included remote with batteries inserted
- An internet connection and your Wi-Fi credentials
- An Amazon account
-
Connect the Signage Stick
Plug it into HDMI and power, then turn on your display and select the correct input.
-
Pair the remote
If it doesn't pair automatically, hold the Home button for at least 10 seconds until the light flashes amber. If that does not work, hold Back and Fast Forward together for 3 seconds. Then press Play.
-
Connect to Wi-Fi
Use the remote to select your network and enter the password. This route also works on an open network. For a hidden network, choose Join Other Network and type its name, security type and password.
-
Visit the Signage Manager Portal
On your phone or computer, go to console.signage.amazon.com and sign in with your Amazon account.
-
Add your Signage Stick
Enter the pairing code shown on the TV, choose Brix Signage, and wait for installation (about 5 to 10 minutes).
Pair the stick with Brix
When the install finishes, the TV shows the Brix player and a six-digit pairing code.
- In Brix, open Screens, select Add screen, then Pair a hardware device.
- Type the six-digit code from the TV.
- Name the screen and pick a location. The location sets the screen's time zone, brand kit and operating hours.
- Give the screen a playlist so it shows content.
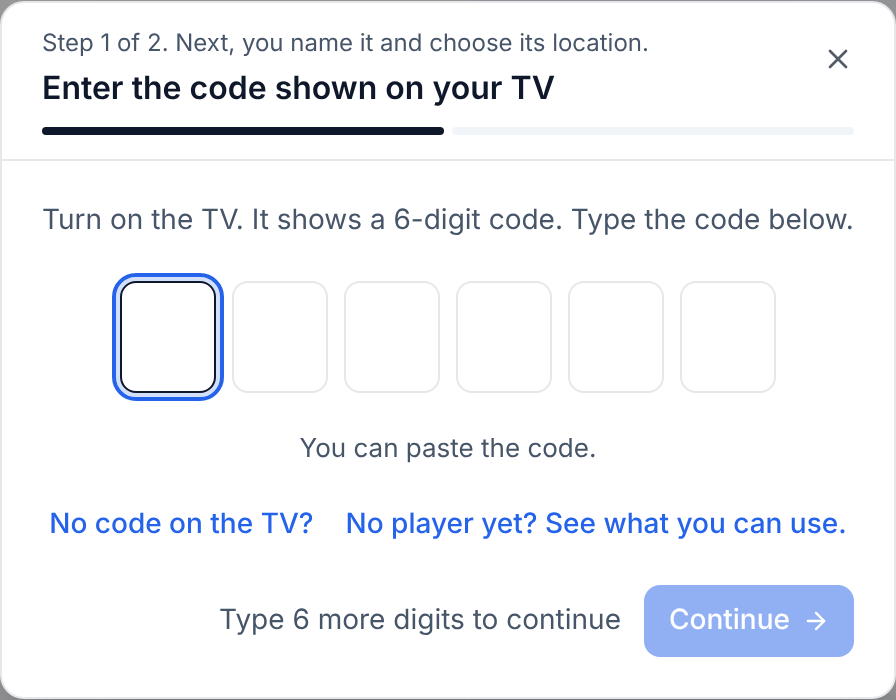
The code is not tied to your phone or network. Once entered, the screen belongs to your workspace, even if you move it to another site. More in connect a screen.
What ports does the Amazon Signage Stick have?
One HDMI plug and one micro-USB power socket. There is no Ethernet port.
| Part | Detail |
|---|---|
| Video | HDMI 2.1 output with ARC, up to 4K. 4K needs a 2160p display with HDCP 2.2. |
| Power | Micro-USB, rated 5.25 V 1.0 A, from the adapter in the box. |
| Wired network | Amazon's micro-USB Ethernet Adapter ($14.99), sold separately. See Ethernet on the Signage Stick. |
| Wireless | Wi-Fi 6E (2.4, 5 and 6 GHz), Bluetooth 5.2. |
| In the box | Stick, remote with 2 AAA batteries, power cable and adapter, HDMI extender. |
| Size and rating | 99 x 30 x 14 mm, 43.5 g. Rated 0 to 35 °C, indoor use only. FCC ID 2A4DH-8592. |
Plug it straight into the TV. HDMI switches and AV receivers often block the HDMI-CEC commands that turn the TV on and off. Use the extender in the box if the port is tight. Power it from the wall: a TV's USB port gives too little power, and the Ethernet adapter needs wall power too.
What network ports does it need?
Outbound HTTPS on port 443. No inbound port and no port forward. The stick starts every connection, so a firewall lets the replies back in by itself. It also needs DNS (UDP 53) and NTP (UDP 123), which most networks already allow.
| Allow | For |
|---|---|
| api.signage.amazon.com, device.signage.amazon.com, api.cm.ds.amazon.dev, api.ota.ds.amazon.dev, api.beta.ota.ds.amazon.dev, api.dt.ds.amazon.dev | Amazon: setup, management and updates |
| api.brixsignage.com | Brix: pairing, content, schedules and live updates. Images and video come from this host too. |
If IT registers devices by hardware address, the MAC address is under Settings, About Device. A firewall that inspects TLS has to exempt this traffic, because the stick cannot add a certificate. The full lists are in network requirements and firewall ports.
Which Wi-Fi can it join?
| Network | Phone app | Remote setup |
|---|---|---|
| WPA/WPA2-Personal, WPA3-Personal, WEP | Yes | Yes |
| Open, or Enhanced Open | No | Yes |
| Hidden name | No | Yes, with Join Other Network |
| WPA2 or WPA3-Enterprise (username or certificate) | No | No |
| Login page (captive portal) | No | No |
- Enterprise-only site? Put the screens on a separate network with a shared password, or use the Ethernet adapter.
- Hidden network? You can also show its name during setup and hide it again afterwards.
- Open network? Follow setup on open Wi-Fi.
- Separate names per band? Amazon recommends one network name across 2.4, 5 and 6 GHz, so the stick picks the best band itself.
- Setting up at your desk for another site? Brix can save that site's Wi-Fi to the stick from the screen's panel, so whoever unboxes it only has to plug it in. See change Wi-Fi remotely.
How do you rotate it to portrait?
In Brix, not on the stick. The stick's own settings have no rotation option.
- Mount the TV on its side and note which edge ends up on top.
- In Brix, open Screens, select the screen and choose a tile under Orientation: Landscape, Portrait, or a flipped version of either.
- If the picture is upside down, pick the flipped tile. Nobody needs to touch the TV.
- Use content made for a tall screen: 1080 x 1920 pixels for HD, 2160 x 3840 for 4K.
Brix asks Amazon's device agent to rotate the whole display, so video turns too. More in portrait mode.
Power and screen hours
- Leave the stick powered. Amazon installs firmware updates between 2 am and 5 am local time, and only if the stick is on. Do not put it on a timer switch.
- Check the screen hours. A new screen defaults to Standard hours, 6:00 am to 11:00 pm. Outside those hours the stick turns the TV off over HDMI-CEC. For a screen that runs all day and night, set Always on. See screen settings and display power.
- Set the volume on the TV. The stick cannot change volume or mute over HDMI-CEC, and its remote has no volume buttons.
- Keep it cool. A sunny window or the wall above a grill line can pass the 35 °C rating.
Once it's running
From the screen's panel in Brix you can see what the TV shows and take these actions without a visit:
- Screenshot, Screen on, Screen off, Clear cache and Reboot, under Player. See Manage your screens.
- Assign content. See Getting Started and Creating Playlists.
- Keep playing offline. Brix stores the playlist on the stick, so it carries on if the internet drops. See offline playback.
Setting up a lot of them? See manage multiple Signage Sticks.
Fixes for common setup problems
| What you see | Try this | Full fix |
|---|---|---|
| Nothing on the TV, or no signal | Select the stick's HDMI input, and try another port. | No signal |
| Stuck on the Amazon logo or a black screen | Unplug the power for 1 minute, then plug it back in. | Stuck on logo |
| Remote will not pair | Hold Home for at least 10 seconds until the light flashes amber. | Remote not pairing |
| Your network is not listed | Press Back to refresh the list, and move the router and stick closer. | Stick not working |
| Stuck on obtaining an IP address | Power the Ethernet adapter from the wall, not the TV. | Obtaining IP address |
| "Bind other OG" error | Unregister the stick in the Amazon Signage console, or email signage-support@amazon.com with its serial number. A factory reset does not clear this. | Factory reset |
| No pairing code on the TV | Check Brix finished installing, then unplug the stick and plug it back in. | Connect a screen |
| Code refused | Type it again. If it still fails, restart the player for a fresh code, because codes expire. | Connect a screen |
| Offline after pairing | Check the stick's network. Its status in Brix updates once it reconnects. | Troubleshoot a screen |
| Drops off Wi-Fi | Check signal behind the TV, or move to Ethernet. | Keeps disconnecting |
| TV goes dark, or the stick turns off | Check the screen hours and that the stick has wall power. | Keeps turning off |
| TV will not turn on or off from Brix | Turn on HDMI-CEC in the TV's settings and remove any switch or receiver. | HDMI-CEC not working |
| Storage warning | Clear the cache from the screen's panel in Brix. | Storage full |
Moving a stick from another CMS? See change the CMS on a Signage Stick.